Configuring iPhone proxy settings lets you manage network traffic and enhance privacy at the system level for any Wi-Fi connection.
Whether you need to setup an HTTP proxy for professional use or you are looking for a way to turn off proxy settings iPhone is stuck on to fix connectivity issues, this guide provides the steps for iOS and iPadOS.
Limitations you should know:
Before setting up, keep these in mind:
- iOS only supports HTTP and HTTPS proxies:You cannot configure a SOCKS5 proxy using the built-in settings.
- No Native proxy settings for cellular data: iPhone allows users to configure HTTP and HTTPS proxies in the Wi-Fi settings. Proxies apply only to Wi-Fi connections and must be configured individually for each Wi-Fi network.
To bypass these limitations:
You can use a verified proxy service, such as Bright Data. Their mobile configuration allows users to handle advanced protocols without manual setup.
How to configure HTTP proxy on iPhone & iPad (manual setup)
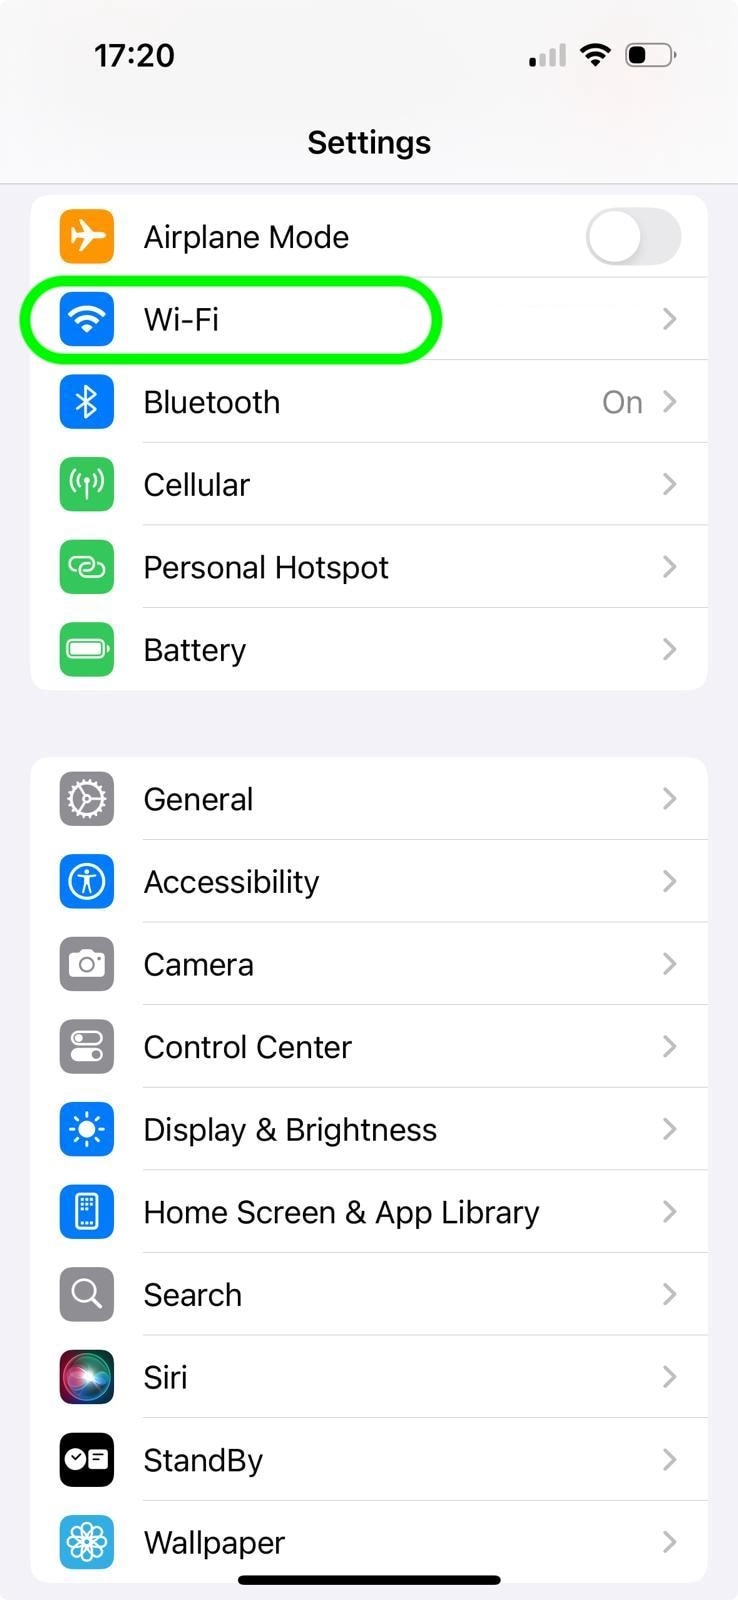
- Open your iPhone settings and tap on Wi-Fi to see the available networks.
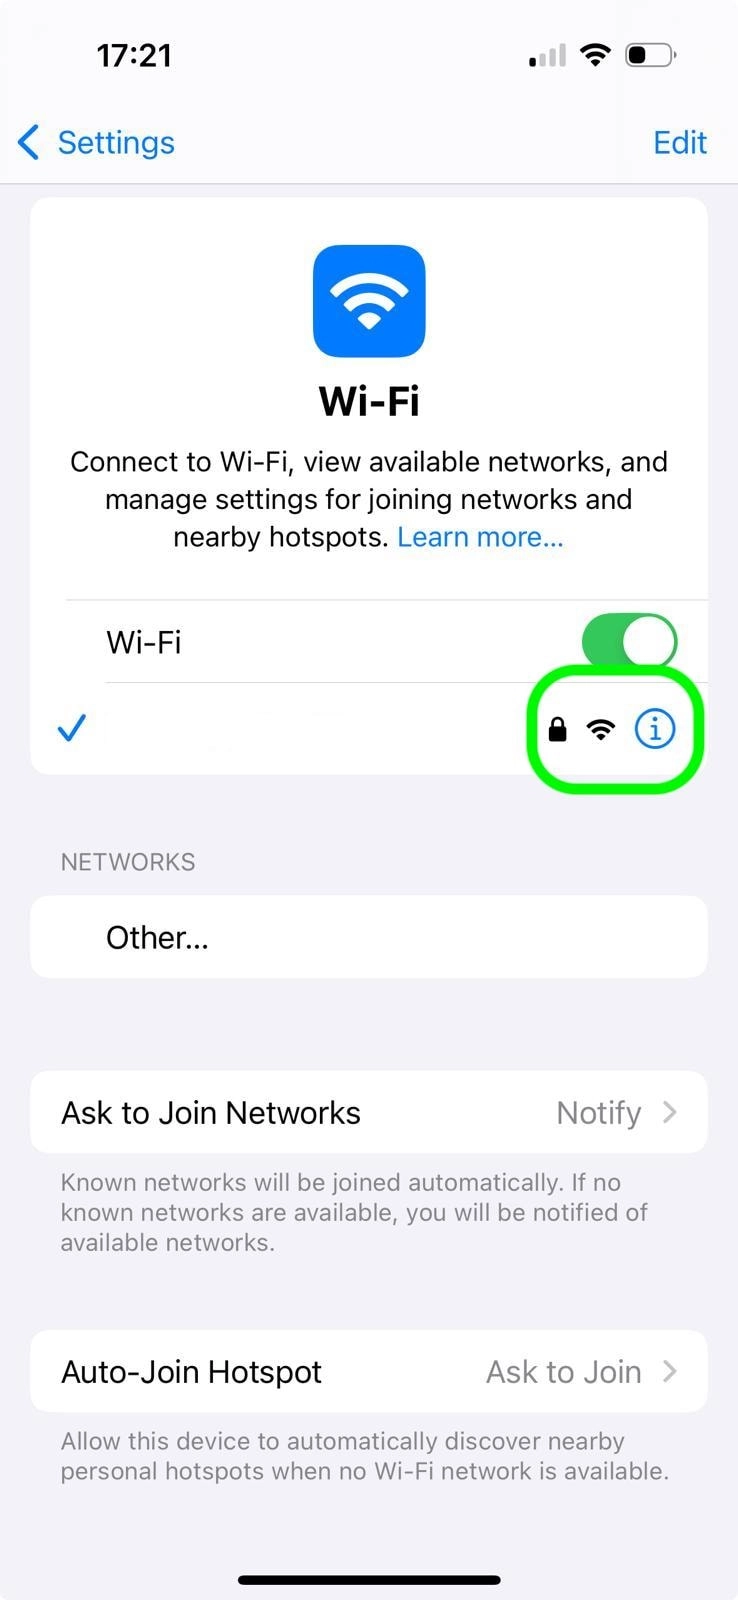
2. Tap the “i” (information) icon next to the Wi-Fi network you are currently connected to.
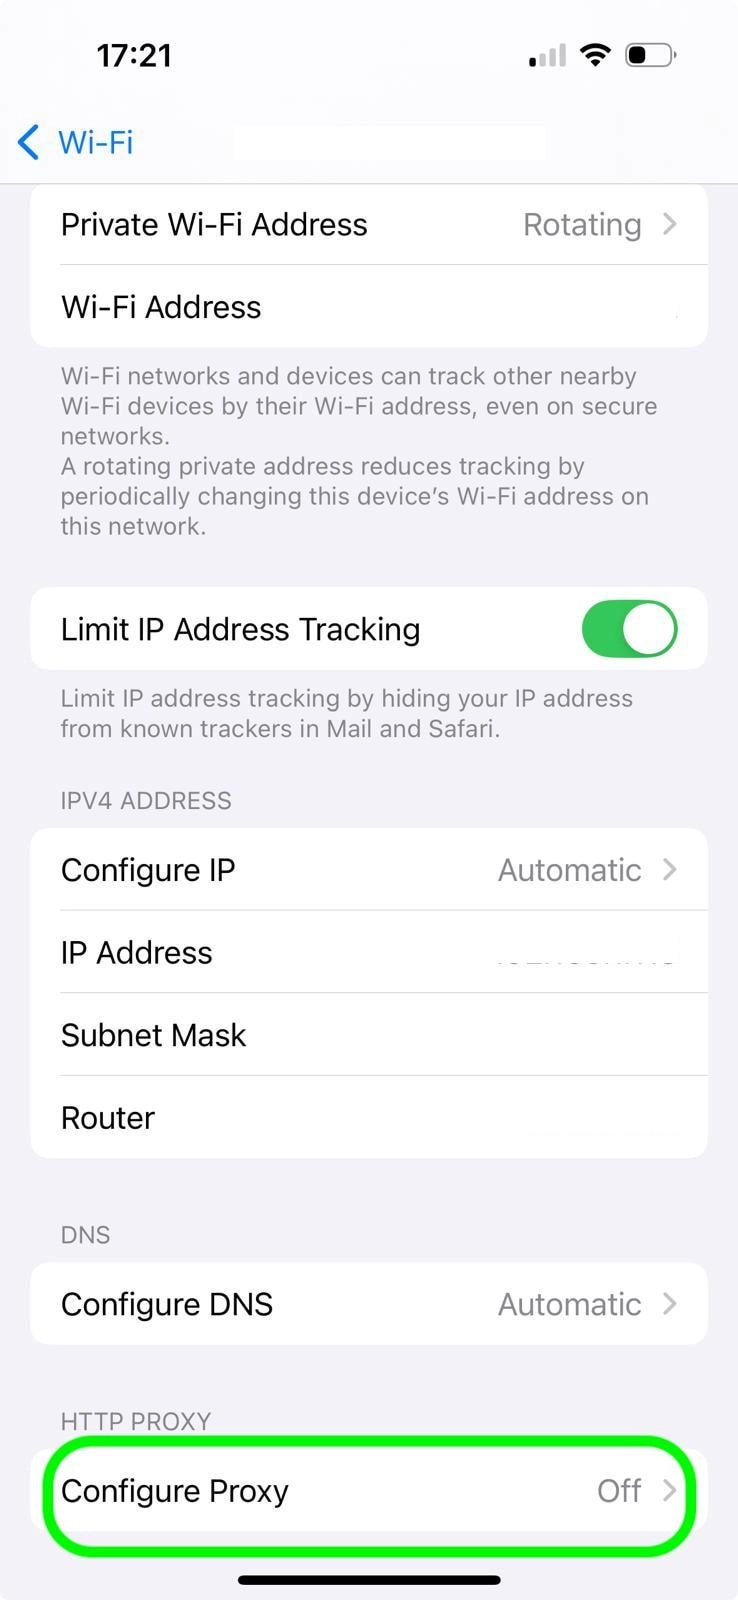
3. Choose “Configure Proxy” by scrolling down to the HTTP Proxy section.
4. Three Proxy Configuration Modes will be displayed to you:
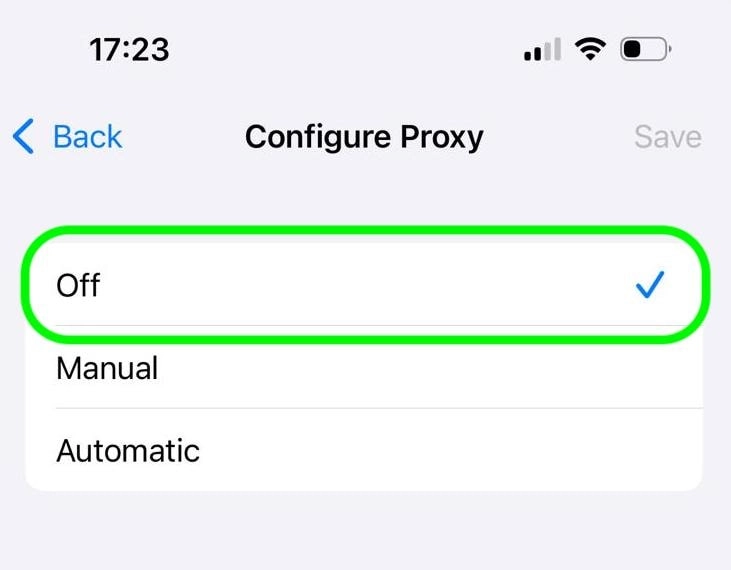
- Off: No proxy is in use.
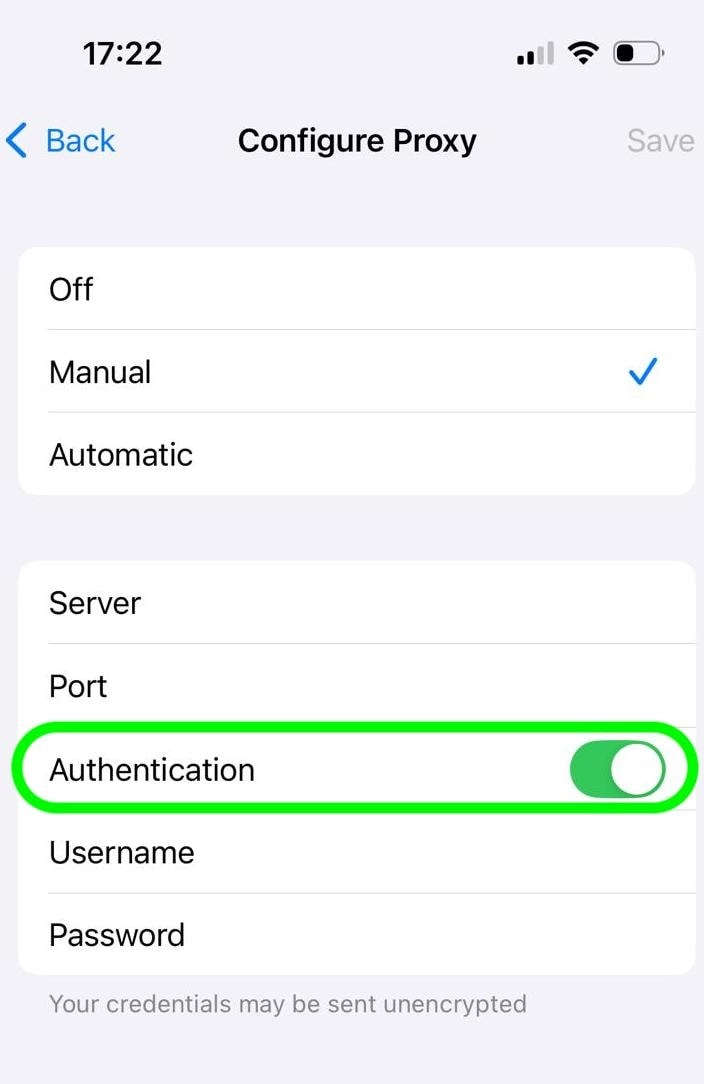
- Manual: Manually enter the proxy information.
- Automatic: Enter a PAC (Proxy Auto-Configuration) or URL.
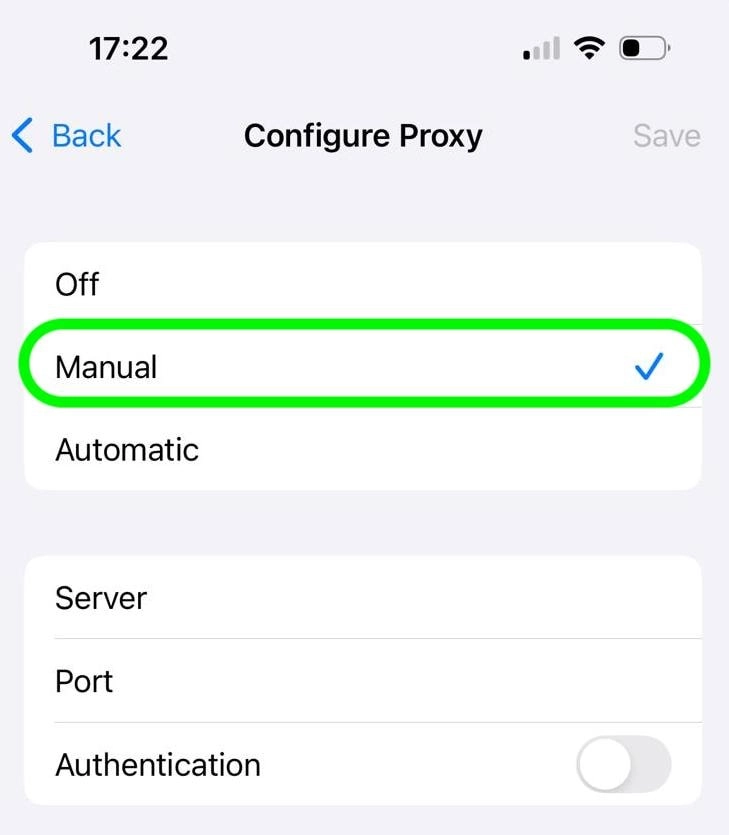
5. For manual configuration, tap manual and enter the proxy details provided by your proxy service providers, including server address and port number. Enable the Authentication option, then enter your username and password if required.
How to turn off or disable proxy on iPhone?
- Go back to Settings > Wi-Fi.
- Tap the blue “i” icon next to the connected Wi-Fi network.
- Scroll down to the “HTTP PROXY” section.
- Select Off.
- Tap Save in the top right corner.
UsingpProxy for iPhone mobile data (cellular connections)
Natively, iOS does not offer a proxy configuration menu for cellular data (4G/5G/LTE).
The ‘Configure Proxy’ option only appears inside Wi-Fi network settings. This is because mobile data connections are managed through APN (Access Point Name) settings.
Many professional proxy providers (like Bright Data or Oxylabs) offer dedicated iOS apps for using a proxy over mobile data. Alternatively, you can use Apps like Shadowrocket, Potatso, or AdGuard, applying to both Wi-Fi and Cellular data.
Manual vs automatic proxy configuration
- Manual Setup: If your proxy provider gives you a fixed server address and port.
- Automatic Setup (PAC file): For enterprise or rotating proxies, since the PAC script can define when/where to use the proxy.
Manual Proxy Configuration:
This is the most common method for individual users to configure their own proxy.
- Tap on Manual.
- Server: Enter the IP address or hostname of your proxy server.
- Port: Enter the port number for your proxy server.
- Authentication (Optional): If your proxy requires a username and password:
- Toggle the “Authentication” switch to the On position.
- Enter your Username.
- Enter your Password.
- Tap Save in the top right corner.
Automatic Proxy Configuration (PAC File)
This method is ideal if your network administrator provides a Proxy Auto-Configuration (PAC) file.
- Tap on Automatic.
- In the “URL” field, enter the web address of your PAC file.
- Tap Save in the top right corner.

Be the first to comment
Your email address will not be published. All fields are required.